Since the weather is getting more like fall, I start to dread getting into the car in the morning. It’s not the cold car holding me back, because that is easily fixed by turning up the heat. It’s the cold steering wheel. For some reason, that never really gets warm while driving, even with the heat turned to maximum. And if there is one thing I hate, it is having cold hands.
So I decided to try out Lion Brand Yarns’ Touch of Alpaca while also tackling my I-don’t-wanna-touch-the-steering-wheel-problem. With these cute armwarmers! I guess they are more like fingerless mittens, but it is enough to keep my hands warm while driving! I made them short on the arms, to still be able to wear my coat (that has sleeves that fit just right at the wrists).
For this pattern, you will need one ball of Touch of Alpaca. You won’t even use half of it, so you can make your partner some gloves as well! Just keep in mind that I have very small hands and wrists, and you might want to make yours a bit bigger. I measured every once in a while by wrapping the piece around my hand. If it doesn’t feel comfortable, make it bigger! In the pattern I will share what my measurements were, but feel free to adjust to your own liking.
The pattern
This gloves are made with the granite stitch (also called moss stitch). This stitch is very easy: sc and then chain 1, repeat (US terms). End each row with 2 turning chains. Below is a quick description on how to get started and how the granite stitch works, but if you need some extra help I recommend watching tutorials to see what’s going on. I used a 5.0 mm hook.
Row 1: To get started, chain 36. For the first row, sc in the first st, followed by chain 1. Skip the next st, and sc in the next one. Again, chain 1. Repeat this pattern until the end. You should end with sc in the last stitch and then chain 2 (to turn).
Row 2-7: sc in the space of chain 1 of the previous row. Chain 1. Repeat this until end of row.
Row 8: increase at the start and end of the row by doing as follows: sc in the last sc of the previous row, chain 1, sc in space of chain 1 of previous row, chain 1. Continue pattern of granite stitch until right before the end of the row. Make one extra stitch (existing of sc and chain) in the last sc of the previous row. This makes sure you can fit the wider part of your hand, just below the thumb, in the glove.
Row 9-13: continue the granite stitch.
Row 14: decrease at the start and end of the row by doing as follows: start making a sc in the chain 1 space of the previous row. Then, before looping over for the second time, insert your hook in the second chain 1 space of the previous row. Pull up a loop there as well, and finish the sc by looping over and pulling the yarn through all three loops on your hook. Continue with the granite stitch. At the end of the row, repeat the steps to decrease in the second to last and last chain 1 spaces. You should be back to your original size now.
Row 15-27: continue with the granite stitch.
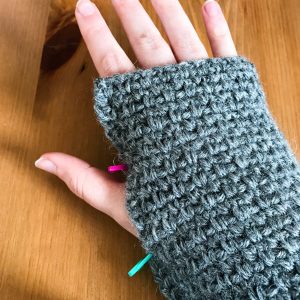
Finish off. Join the two sides with slip stitches. The bottom part should go from the bottom to the end of row 14. The top part should go from row 20 to the top. This way you leave enough space for your thumb to go through. It is easier to mark the space for your thumb with stitch markers.
Sc around the space for your thumb to give it a nice finish. And you’re done!
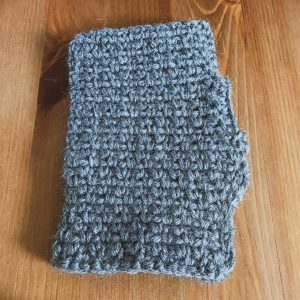
Try to make the slip stitches from the front, so the gloves look equal when you wear them. You can see in the image in the header of this post what I mean: the glove that is palm-up has a little brim, the one palm-down does not. When I have my hands in the same direction, the slip stitches are on the same side.
And there you have it! Keep your hands warm while driving, walking the dog, anything that requires mobility of the fingers.
I would love to see what you did with this pattern. Use #nerdwithyarn to show me your projects, finished items, struggles and more! Also, for feedback or questions, you can always contact me on Instagram or by sending an email to info@nerdwithyarn.com. There is also a contact form on this website, to add another easy way of contacting me!

