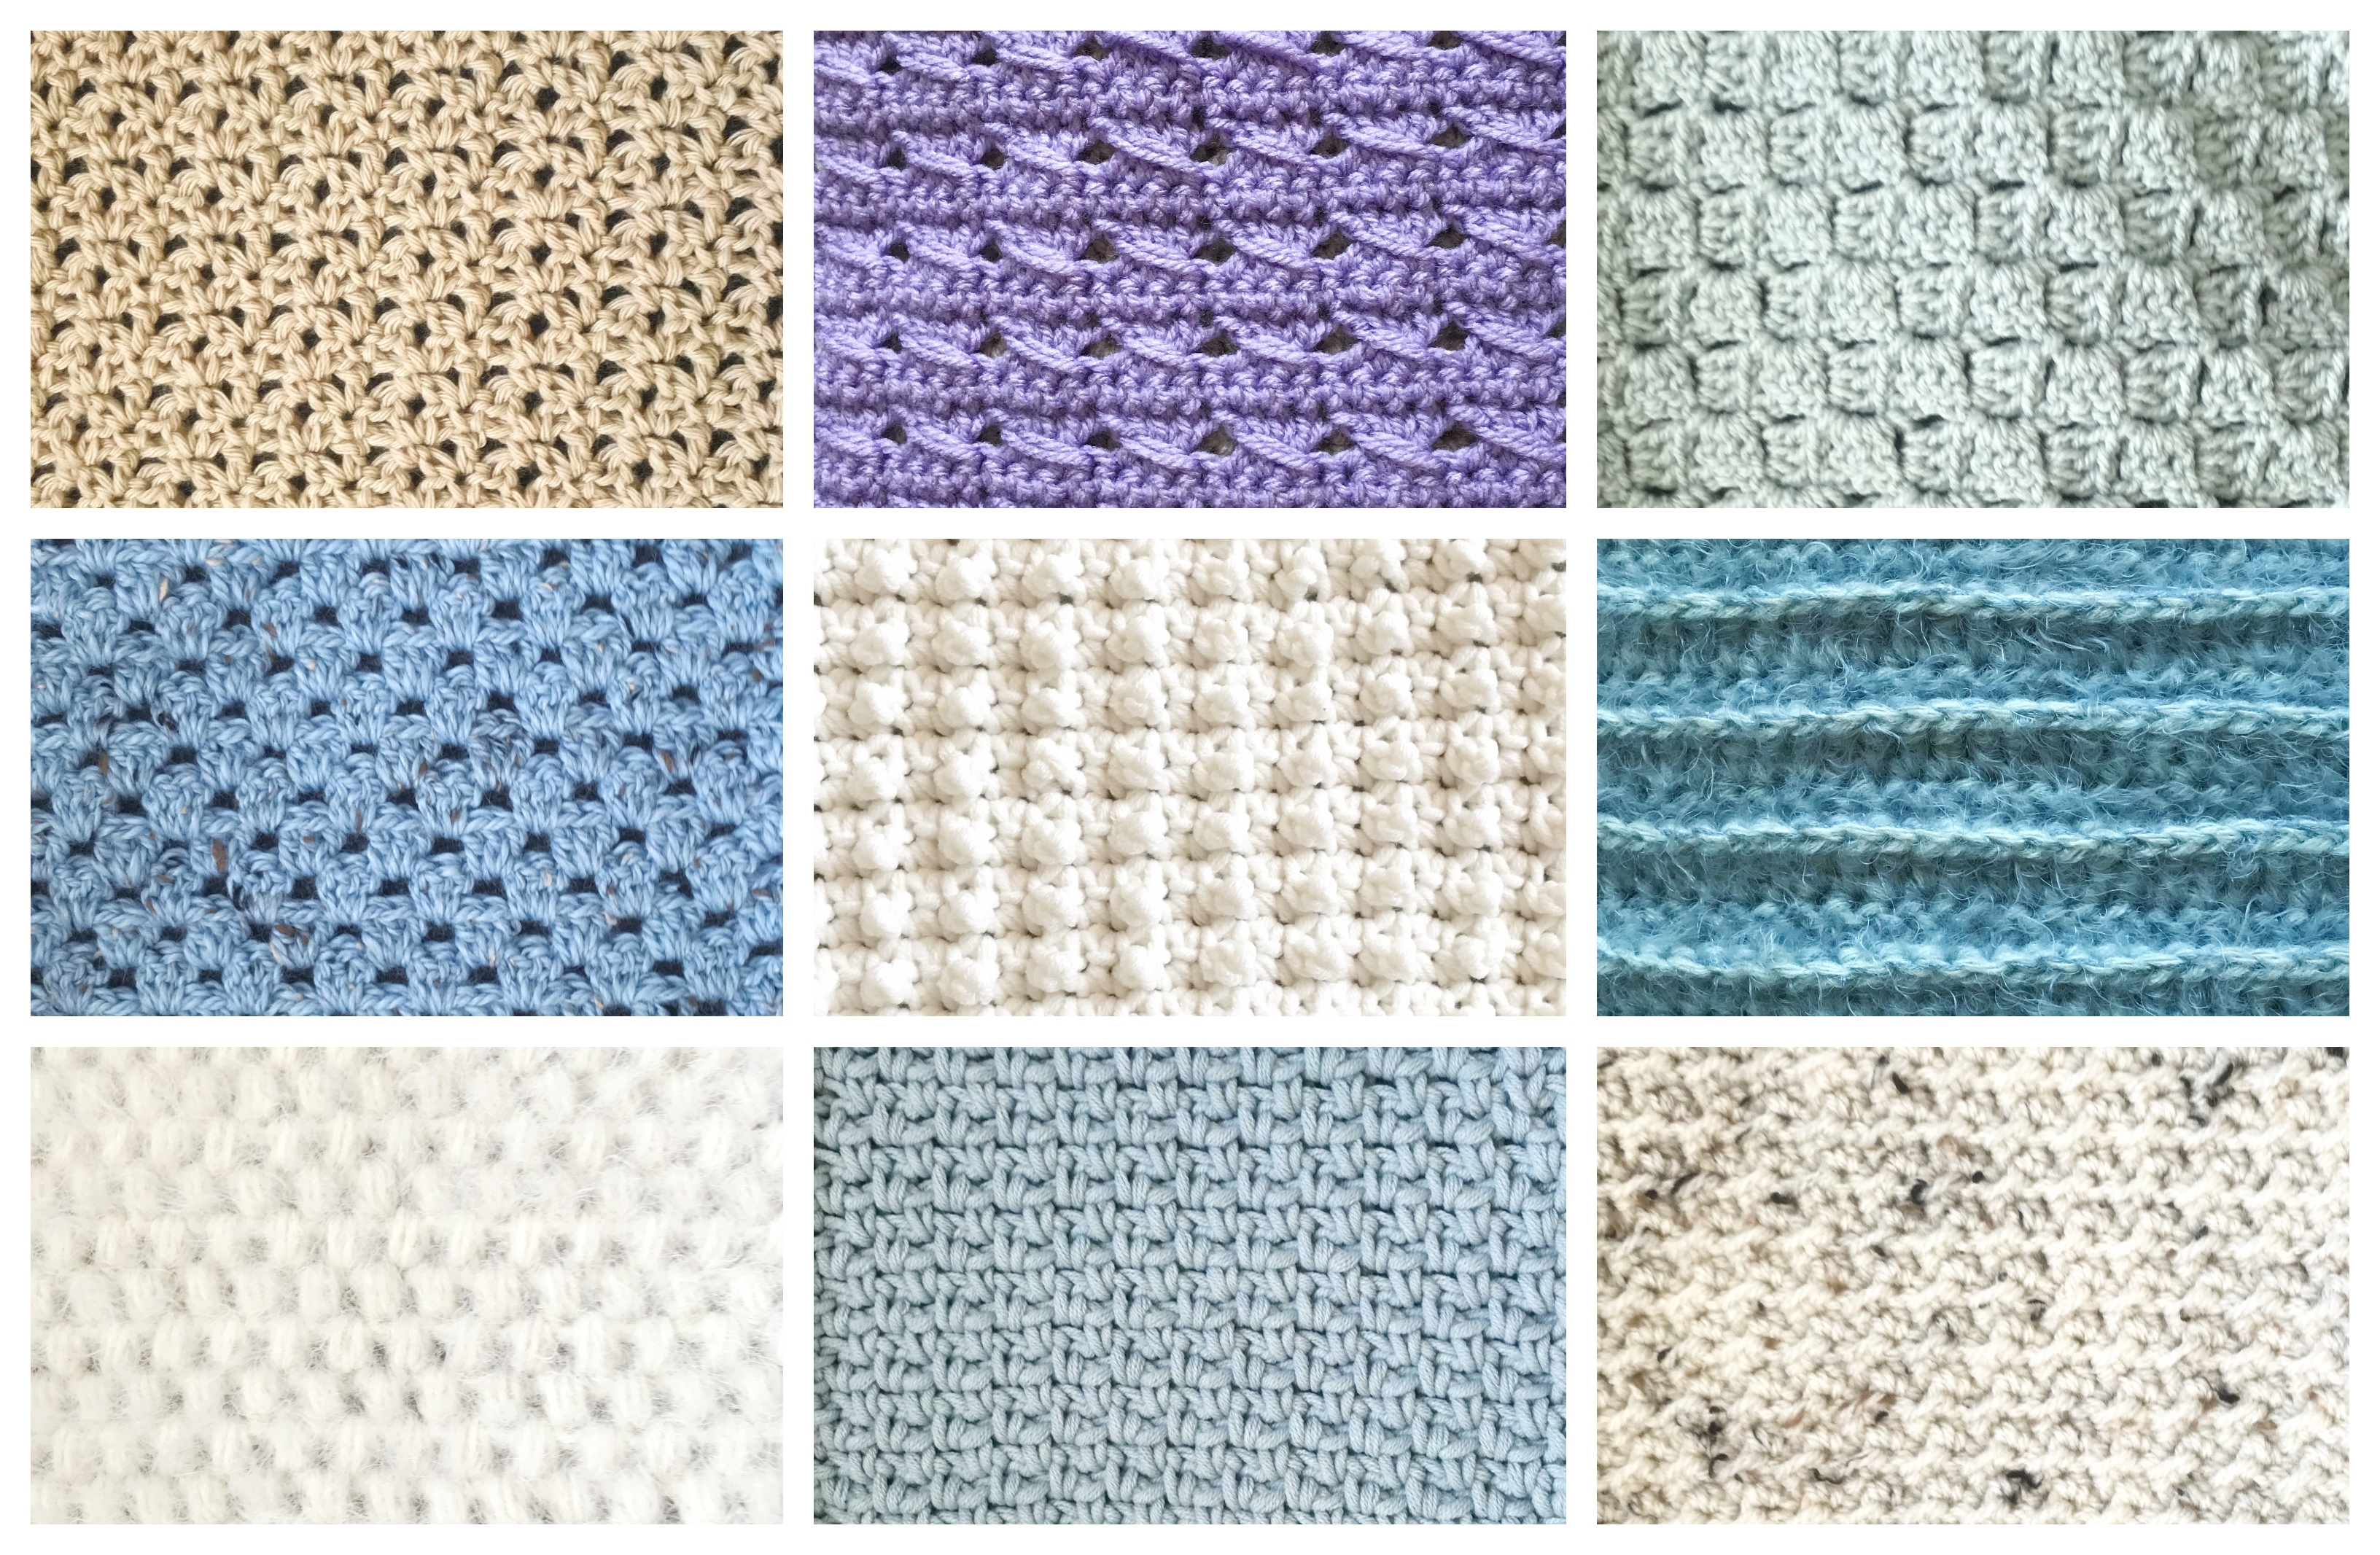
In the previous tutorial, you learned about starting, chaining, slip stitches and single crochet (double crochet in UK). Today we will continue our journey into the fabulous world of crochet. It is time to learn the other three basic stitches: half double crochet or hdc for short (half treble in UK), double crochet or dc for short (treble in UK) and triple crochet or trc for short (double treble in UK). When you master all these stitches, you will be unstoppable! Any pattern or stitch exists of the five basic stitches, alternated to make a beautiful pattern.
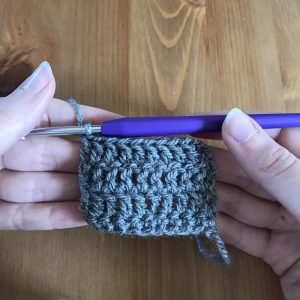
To make the different stitches better to see on the pictures, I started with a chain of 10 and sc for one row. If you’re starting with a pattern, be sure to read the first row carefully: to turn, you will need more chains when you’re using one of today’s stitches. If a pattern starts with one row of dc, you will have to chain 2 or 3 extra – depending on your tightness. When you need 10 stitches, chain 12 or 13 to start. Insert your hook in the third or fourth chain, instead of the second.
So let’s not waste any more time and dive in with the first stitch of today: half double crochet.
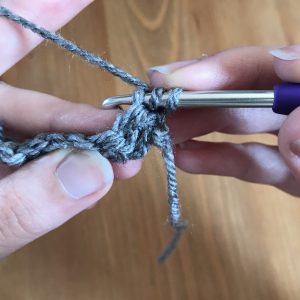
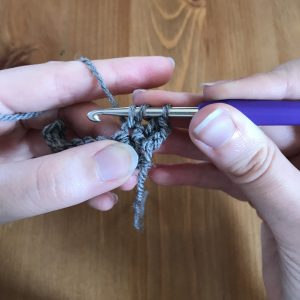
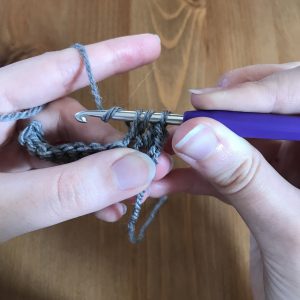
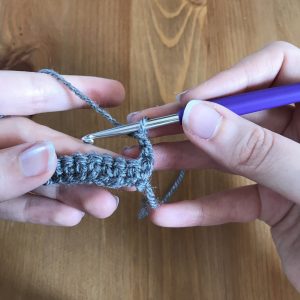
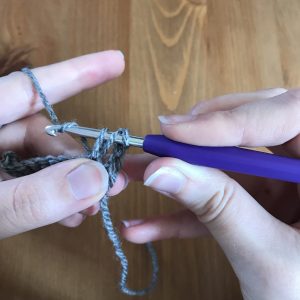
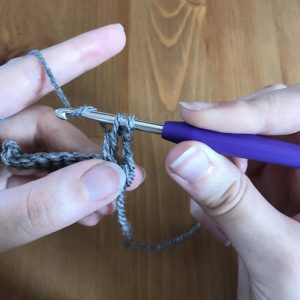
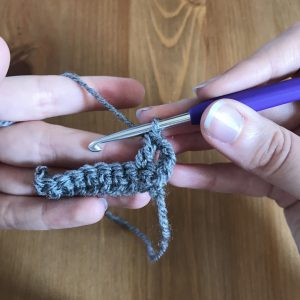
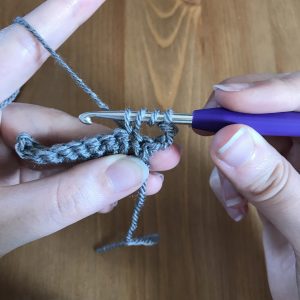
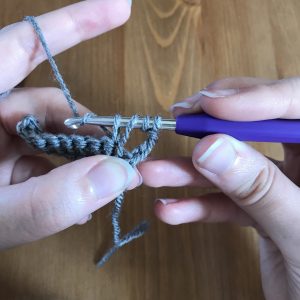
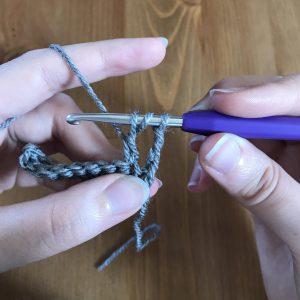
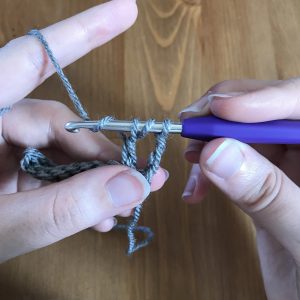
Half double crochet (hdc)
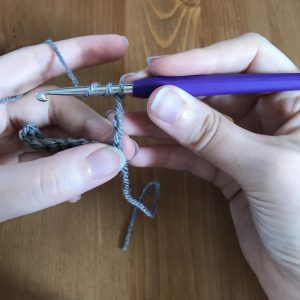
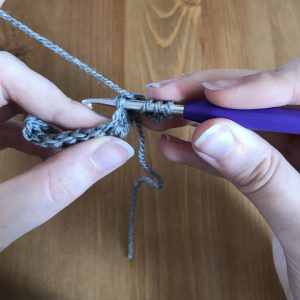
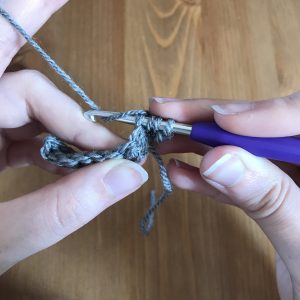
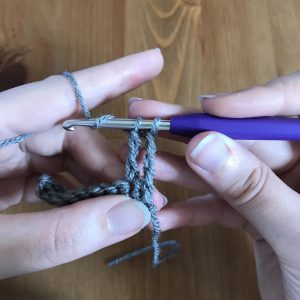
To get started with a row, end the previous row with 2 turning chains. Then, wrap the yarn around your hook once. Insert your hook in the next stitch, pull up a loop like you do with sc’s. You now have 3 loops on your hook. Yarn over again and pull that through all three loops. Below is a picture-tutorial to see the different steps!
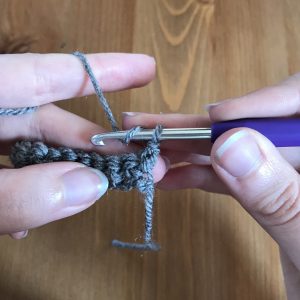
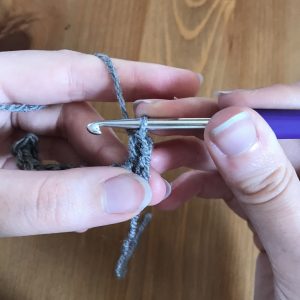
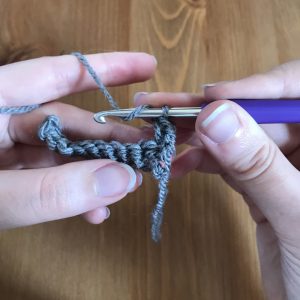
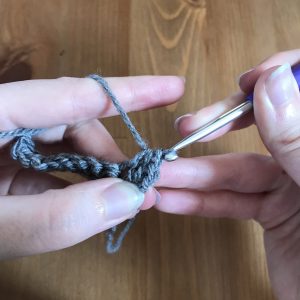
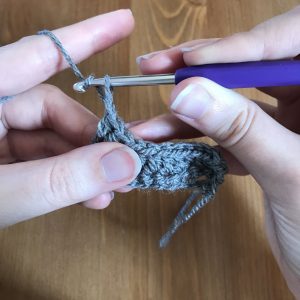
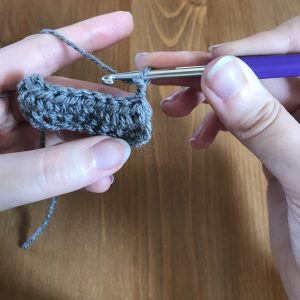
Pay attention to where you insert your hook. The little “V’s” that make for a stitch are always on top. It should feel natural to insert your hook. With these hdc’s, it might look like the “V’s” are at the front of the previous row, but they are actually on top.
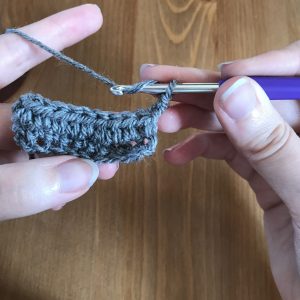
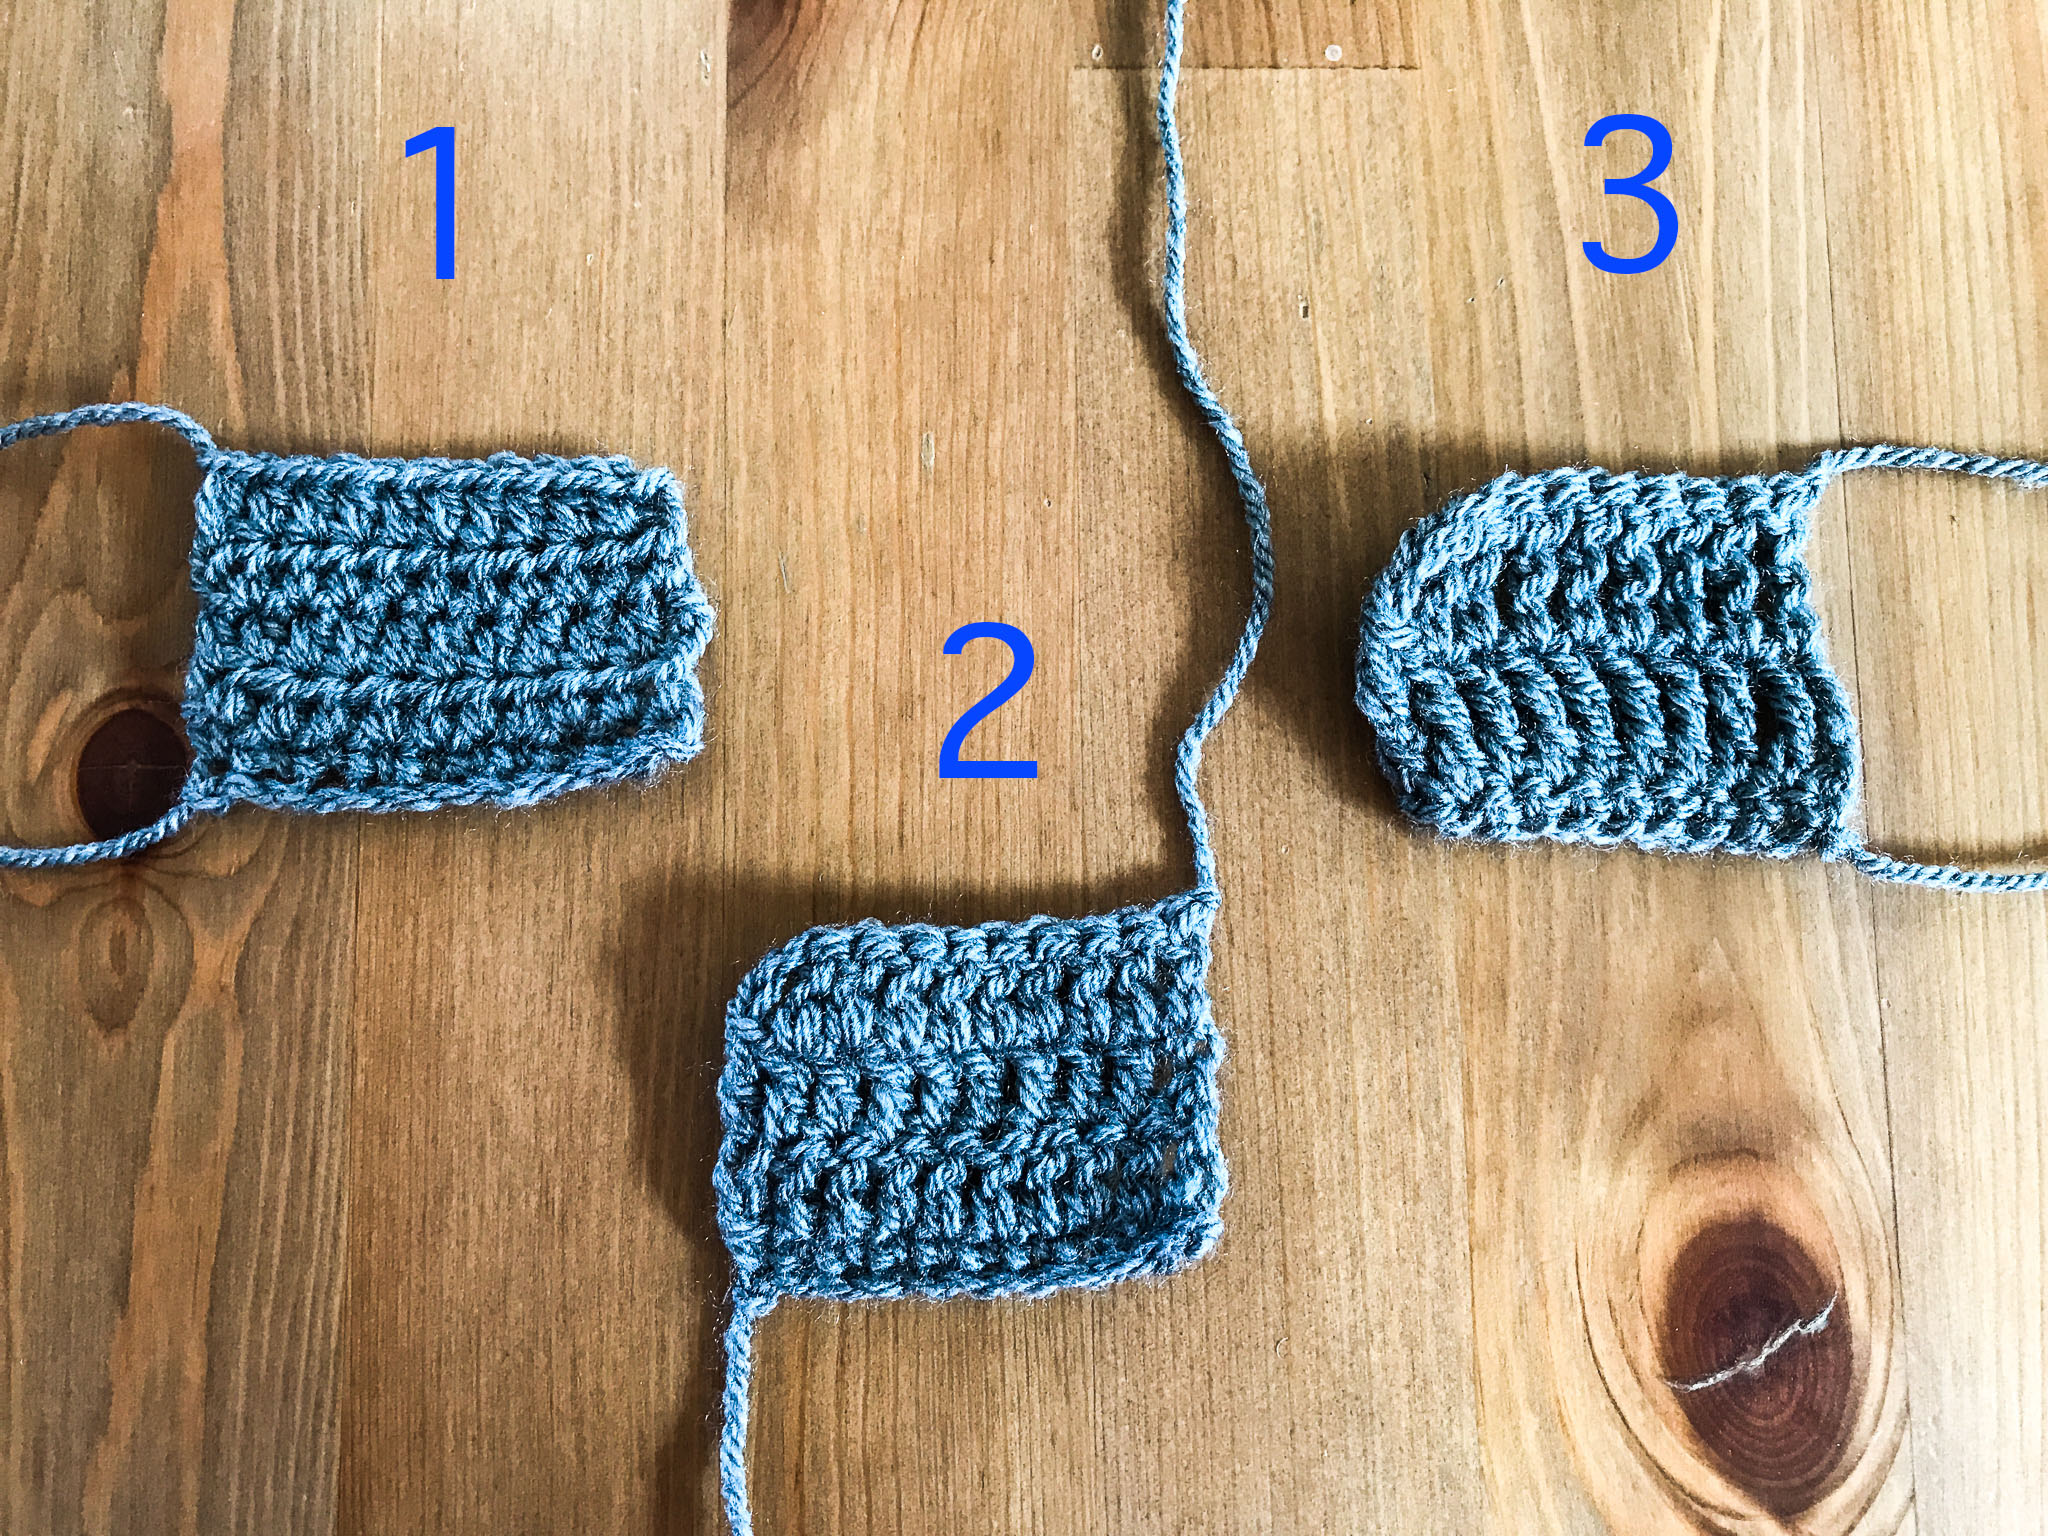
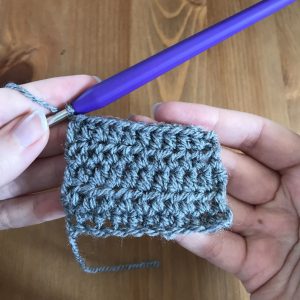
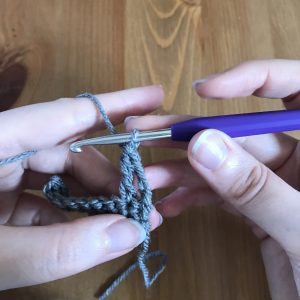
These hdc’s are a lot like sc’s, but with one extra loop at the start. Before going on to dc’s, here are some pictures on how it looks when you have a few rows done.

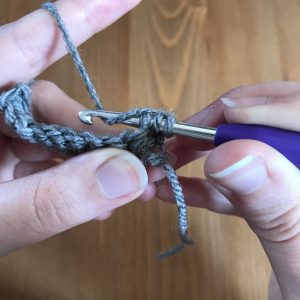
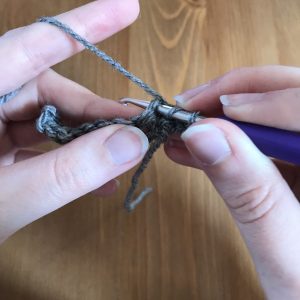
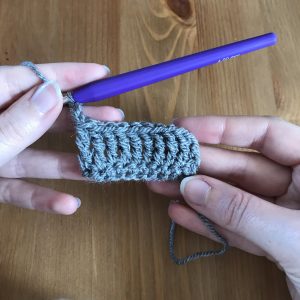
Double crochet (dc)
For dc’s, each row starts with 3 chains. At least, that is the way everyone taught me. But I found out that starting with 2 chains is sometimes better. It really depends on the pattern, the needle and your tension. If you find 3 chains to be too floppy, use 2 chains to turn instead.
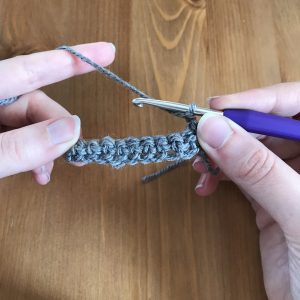
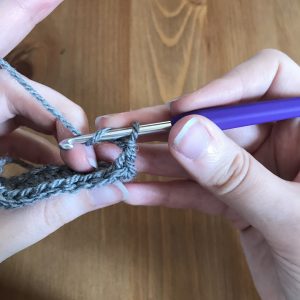
This stitch is very similar to hdc’s, because you also have to yarn over before inserting your hook in the next stitch. Instead of pulling the yarn through all three loops, you pull through only two. Yarn over again and pull through the remaining two loops. Check out the pictures below for a view!


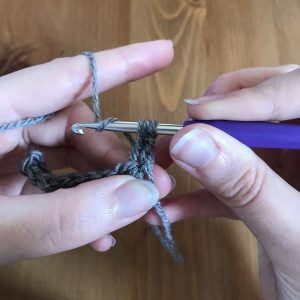
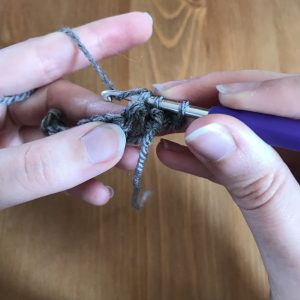
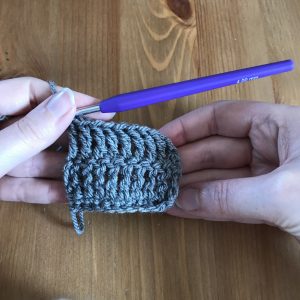
Triple crochet (trc)
Are you ready for the last stitch? This one is super easy, because it is similar to dc’s. In fact, it is a dc but with one loop more! To get started, you need 4 turning chains. Again, this depends on your tension, the pattern and your hook: if it feels too loose, chain 3 instead.
Yarn over twice. Insert your hook, yarn over and pull up another loop. There are four loops on your hook. Yarn over and pull through two loops. Yarn over again, pull through two loops. And again, yarn over and pull through two loops. This is all! See the pictures below for a detailed view.


And there you have it! Those are all the stitches you need for crochet. The next tutorial will be about changing color and starting a new thread. Keep an eye on my newsletter and Instagram to stay updated. And one final tip: don’t give up. It might seem impossible at first, but eventually you will get the hang of it and you’ll be making awesome scarfs and blankets in no-time!